Utilize A Button Maker Gain The Benefits
Any machine can help speed up a process and make it easier than if you do everything manually. The machine that makes buttons is no exception. These are the advantages of using a button maker.
Precision
Is it possible for buttons to be created manually while maintaining the shape and size perfectly symmetrical? It's possible, but only a few times. A badge maker is a fantastic tool to help you cut the button exactly the way you want it.
The cutter on this machine enables you to create perfect circles or any other form every time.
Customization
It would be boring if all badges pins and buttons were alike, wouldn't they? Enter the badge maker for buttons! It lets you create a great degree of customization.
Pins and badges based on your company's logo or image. A multi size button maker can also allow you to design buttons of any possible shape and size, hence making it possible for you to add personalization to your products.
Time-Saving
It is able to generate a number of buttons in a single go that can save you time. This will save you time and improve your efficiency. It's also essential to meet deadlines, which is vital for businesses that have clients.
Creativity stimulator
A button maker will allow users to show off their creative side. The tool will stimulate your imagination with the many options it provides. Once you start working with this machine, you will find out that you can customize it to function according to your specific ideas. This will help you develop your creative skills.
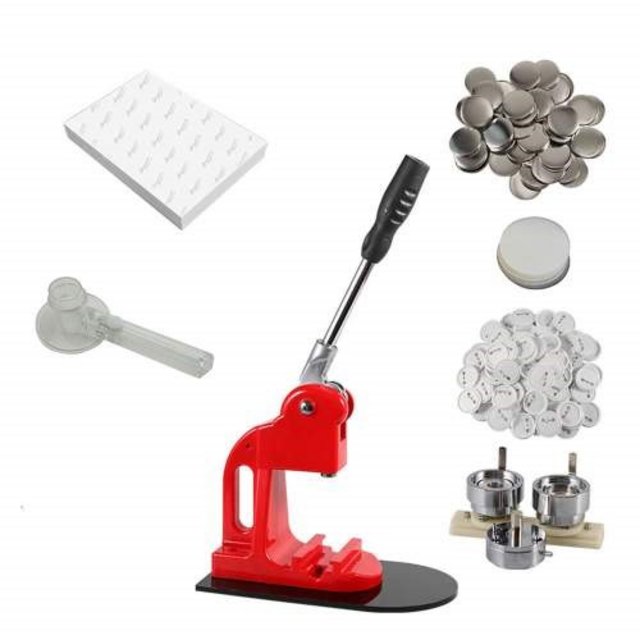
Utilizing Guideline for Button Maker
While button makers do come with the installation and usage guidelines This article will provide you the general guidelines and procedures for the identical.
Set-Up
Every machine is different and will require a different setup. However, the most common principle is to connect the stick and grip to the main body of the machine. Make sure you have the correct bolts. Install the bolts on the base plate.
The next step is installing the top and bottom molds, and then you're good to go.
Designing The Design Ready
Print your logo or design on normal paper. It is easy to cut your design to the exact size you need using the round cutter. To ensure alignment, the design you cut must be exactly the same in size as the transparent film.
Mold Setting and Picture Placement
Place the bottom mold onto the machine, then place the top mold on top. Then, place the cover made of metal inside the top mold cover.
Put the metal cover in the slot on the left side of the die. Then, place the image of the design or fabric along with a transparent film on the metal cover. When you place the picture ensure that you print the image.
The Final Step
The buttonholes will imprint an image when you press down on the handle. Keeping the zigzag part facing upward, put it inside the right-hand side of the die and then press down the handle to complete the process. As you press down the handle, there should be no space between the upper and lower dies.